I was contacted about a month by a guy who was referred to me through someone he met associated with a local award-winning craft brewery. Apparently I worked on a turntable now in the possession of brewery guy and he was happy with the work. I'm curious as to who that was. Beer connections are always good.
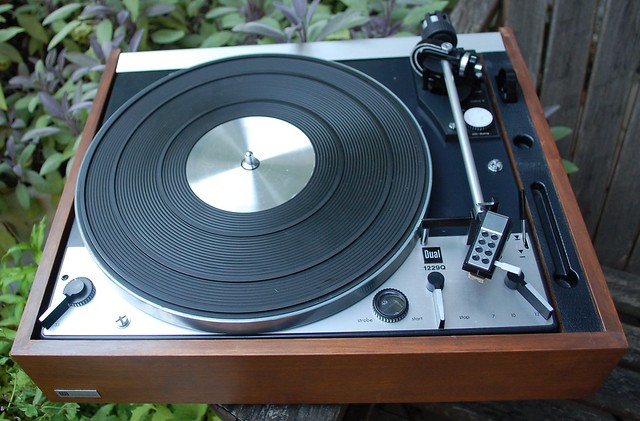
Anyway, we agreed that I would work on his Dual 1229Q. I've worked on a few before but they were simple jobs and this new guy wanted to really treat it right and was not afraid to spend some money to do so. The 1229Q is worth the effort as well as it is arguably one of their best idler drive tables. It shares top billing with the 1219, 1229 and 1019 (my personal favourite).
The issues were the usual stiff mechanism, erratic tonearm movement, signal loss and so on. The owner brought it over after ordering a few things from an eBay vendor. Those items were a pair of aftermarket steuerpimpels (one for me), the Alvania grease that Dual asks for in the service manual, and the lifter ring for the single/multi play lever. He also received a 62 page pdf file of a custom service document.
The steuerpimpels are nicely made. Probably better than the ones I make from insulation but mine seem to work well too. I actually just acquired some silicon tubing that I am going to test in that application too. The lifter ring looks good, and the grease might be better than what I have used though I can't be sure. He wanted to be as original as possible.
Original didn't quite pan out, but more on that later.
I spent a good amount of time going through the mechanism to remove old grease and re-lube as needed. The speed selector is a common stiff area. The original lifter ring was actually quite soft and supple so I am not sure it needed replacing but I did it anyway.
I won't provide pictures and description of all the areas I worked on as they are well documented elsewhere, but I will mention one. Oddly enough, even in the large file I was sent I see nothing about it but I have encountered this on several Dual turntables.
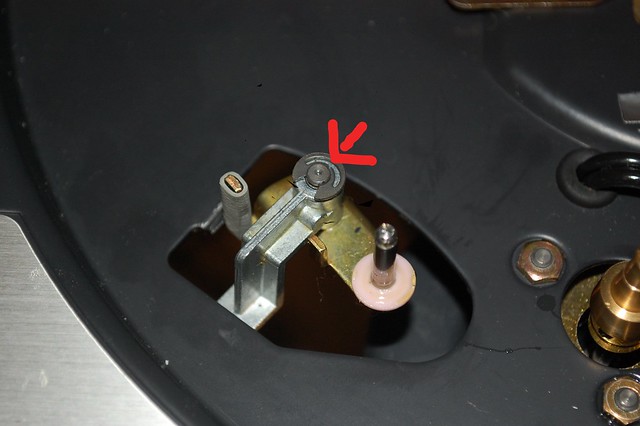
That area is the last pivot point before the idler wheel. It normally is out of sight under the rubber idler which slides onto the shaft to the lower right of the arrow. With the idler removed (easy to do but don't lose the plastic retaining washer) you can see the problem area at the head of the red arrow. That is a metal on metal pivot point and it frequently is very stiff or even immovable due to dried up lubricant. If it doesn't move freely the idler will not make good contact with the motor capstan and/or platter. Result? Slow or no platter movement.
The solution is to remove the e-clip and force the arm out from the bottom, clean thoroughly, lube and reassemble. I have found some so stiff that they were very hard to get off. Applying heat helps, such as a heat gun or even a hair dryer on high, as this will soften the old grease.
Anyway, we agreed that I would work on his Dual 1229Q. I've worked on a few before but they were simple jobs and this new guy wanted to really treat it right and was not afraid to spend some money to do so. The 1229Q is worth the effort as well as it is arguably one of their best idler drive tables. It shares top billing with the 1219, 1229 and 1019 (my personal favourite).
The issues were the usual stiff mechanism, erratic tonearm movement, signal loss and so on. The owner brought it over after ordering a few things from an eBay vendor. Those items were a pair of aftermarket steuerpimpels (one for me), the Alvania grease that Dual asks for in the service manual, and the lifter ring for the single/multi play lever. He also received a 62 page pdf file of a custom service document.
The steuerpimpels are nicely made. Probably better than the ones I make from insulation but mine seem to work well too. I actually just acquired some silicon tubing that I am going to test in that application too. The lifter ring looks good, and the grease might be better than what I have used though I can't be sure. He wanted to be as original as possible.
Original didn't quite pan out, but more on that later.
I spent a good amount of time going through the mechanism to remove old grease and re-lube as needed. The speed selector is a common stiff area. The original lifter ring was actually quite soft and supple so I am not sure it needed replacing but I did it anyway.
I won't provide pictures and description of all the areas I worked on as they are well documented elsewhere, but I will mention one. Oddly enough, even in the large file I was sent I see nothing about it but I have encountered this on several Dual turntables.
That area is the last pivot point before the idler wheel. It normally is out of sight under the rubber idler which slides onto the shaft to the lower right of the arrow. With the idler removed (easy to do but don't lose the plastic retaining washer) you can see the problem area at the head of the red arrow. That is a metal on metal pivot point and it frequently is very stiff or even immovable due to dried up lubricant. If it doesn't move freely the idler will not make good contact with the motor capstan and/or platter. Result? Slow or no platter movement.
The solution is to remove the e-clip and force the arm out from the bottom, clean thoroughly, lube and reassemble. I have found some so stiff that they were very hard to get off. Applying heat helps, such as a heat gun or even a hair dryer on high, as this will soften the old grease.
After working out most mechanical bugs relatively easily and predictably, but also spending hours on trying to get a consistent signal, I had to make a phone call to the owner.
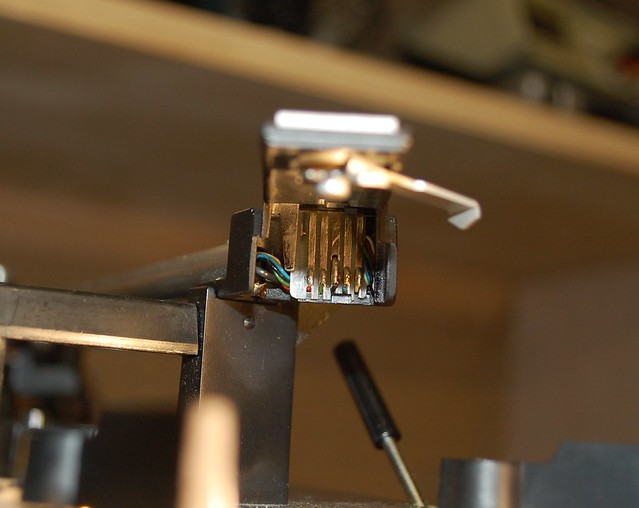
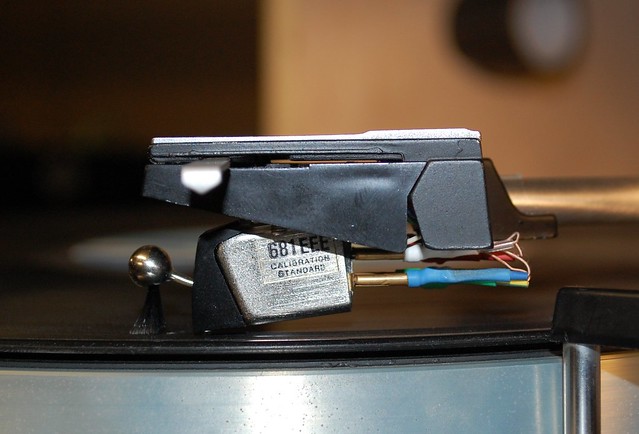
The Dual cartridge holder is a great thing in some ways as it allows for easy cartridge changes. However it is prone to corrosion and other issues that impede the signal path. I cleaned extensively used my meter a lot, removed and reinstalled, tried different cartridges, touched up solder joints and on and on, but I still I could not get a consistent signal on one channel. When I did get one it would usually go away after the needle was on the record for a minute or 2.
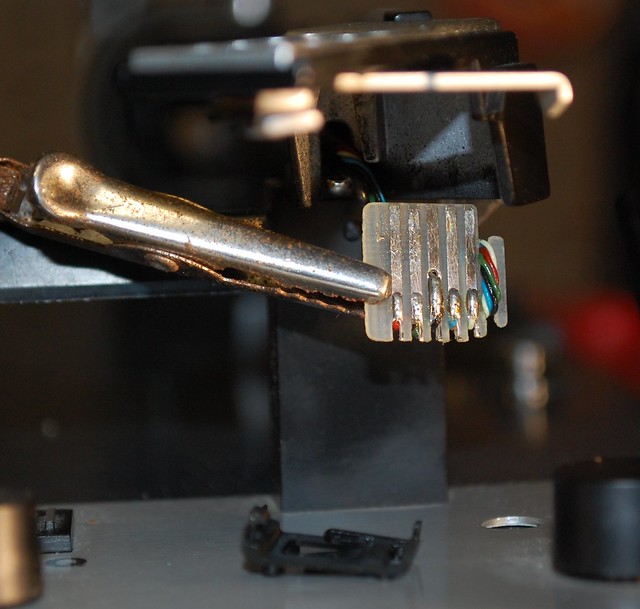
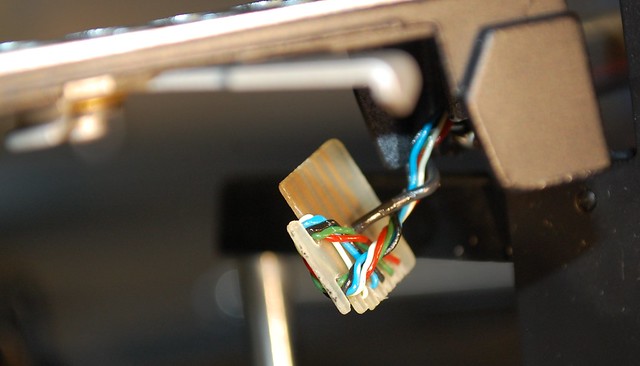
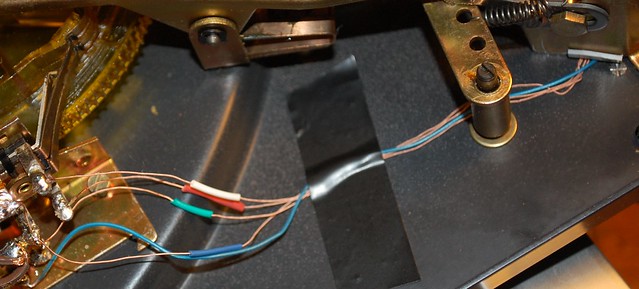
This lead me to the conclusion that a wire was broken somewhere in the tonearm. I reflowed solder joints at the little printed circuit board in the end of the arm and that did not help either. We agreed that re-wiring the arm was probably best. The pics below show the PCB in the arm which was soon to be no more.
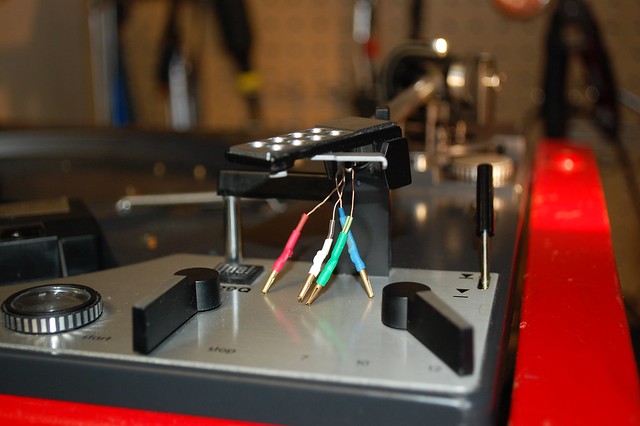
This part of the job was an outright pain in the ass. I have rewired tonearms before but it's never really much fun. The wires I had already on hand, Litz wire from ISOkinetik.
I won't describe the process completely but I threaded the new wires through after soldering them in a bunch to one of the old wires and pulled them through that way. Getting them to go through the various bends was a bit tricky but eventually it worked out.
The end result was a complete bypass of the contacts in the Dual sled. The tonearm wires now push directly onto the cartridge pins and travel uninterrupted to the circuit board at the muting switch under the turntable. I removed the pins and leads in the sled and the PCB in the arm. It's not as convenient to change a cartridge now, but it works...and works well!

I wasn't done yet. After dealing with all of this, I told the owner that he could pick up his machine. However I was test driving the table for a few hours (I almost always do this before returning a repair to a client) and was starting to hear annoying chirping sounds. I realized this was coming from the motor, so decided to throw in a motor overhaul.
I've done a full disassembly and relube of some Dual motors in the past but not of this series, so I told the owner this would be "on the house" as I would put it down to practice. After all I have a 1219 of my own to do soon...
It is actually pretty easy and again well documented elsewhere, so I won't shows all the details here. Here's the motor removed from the chassis.
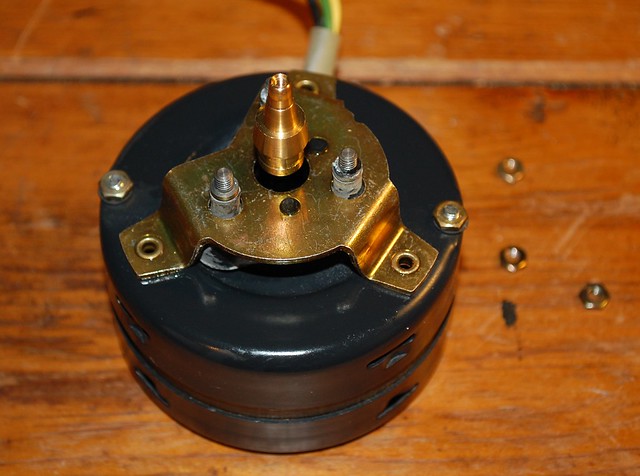
I took the next picture to help me get the capstan at about the right height when I put it back together. I still had to move it a couple of times to get it right.

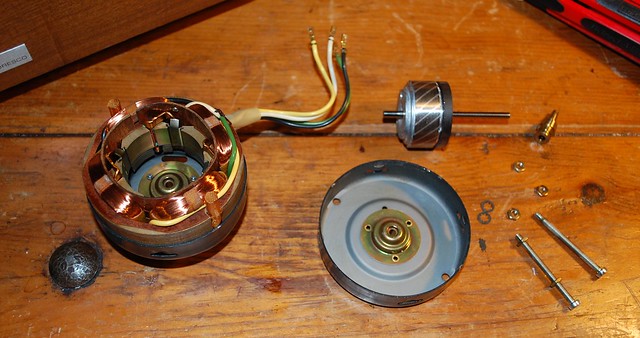
The motor in pieces. The hardest part was prying the 2 halves of the clamshell housing apart. It will be easier next time as I have a tool in mind.
The areas that needs oil at this point are the center brassy coloured bushings in the 2 halves of the housing. I used several drops of 10W40 non synthetic oil from the auto supply store 2 blocks away. I'll keep a small bottle and put the rest in my car.
Here's the inside of the box that contains the wiring harness. It's always a good idea to take pictures of these places to help putting them back together properly later.
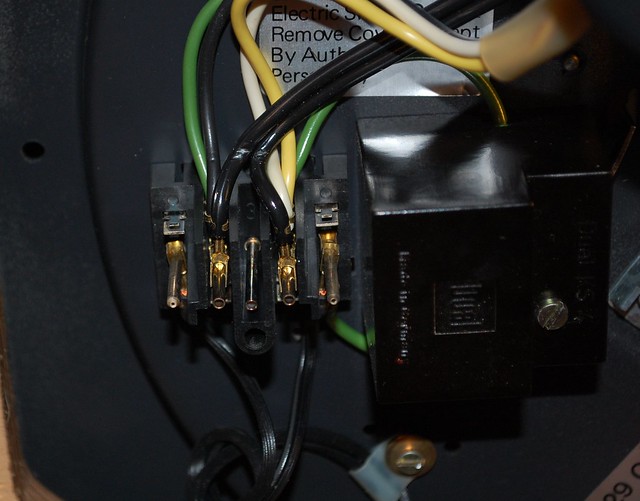
I didn't take a picture of the insides of the box beside it. That contains the spark suppressing capacitor. As it tuned out, after doing everything else, there was a 'pop' still as the turntable motor started and stopped. I did not remove the existing capacitor but bridged it with a new one similar value, a .10mfd at 630 volts (the original is 700 volts) and the noise went away.
Phew! I think I am done...
And the owner has his turntable back. My hourly rate on this one was terrible, especially after considering parts and trips to the electronics store but it was another learning experience. If I have to do one like this again, it will go more smoothly I hope!
You nailed a problem I had with the idler wheel skipping the platter. The brass piece on the idler arm was froze. Never knew it should move since it was centered and looked spec. THANK YOU!
ReplyDelete-Dan
Excellent Dan! I've seen them with every level of resistance from immoveable (like yours) to very free. If you don't know the importance of it it's a tough one to pin down.
DeleteI'd like to know also... i'm rebuilding a 1219, and the motor is frozen..
ReplyDeleteThis comment has been removed by the author.
ReplyDeleteI had in mind something with a couple of bolts and washers, drilled through a block of wood with just the right spacing to have the washers catch the divots in the housing. You would turn some nuts on the bolts to gradually spread the washers apart taking the motor apart with them. That's sort of the concept anyway, kind of a puller.
ReplyDeleteI just replied to the above comment, but here it is again: I had in mind something with a couple of bolts and washers, drilled through a block of wood with just the right spacing to have the washers catch the divots in the housing. You would turn some nuts on the bolts to gradually spread the washers apart taking the motor apart with them. That's sort of the concept anyway, kind of a puller.
ReplyDeleteHowever this might be more complicated than it is worth. My memory is not clear on how difficult that disassembly was but I don't think it was terrible.