Over at Audiokarma I was recently the recipient of some karma when one of the good folks there offered an unbuilt tube amplifier kit for free, "just pay shipping". I was the first to jump in and say "I'll take it!" and picked it up a couple of weeks ago down at Point Roberts. The border guys were skeptical of my free amplifier kit asking what the value was. I said about $100 and after the guy opened the parcel my claim was reinforced by the fact that this kit had been sent from the importer to the guy in Illinois from Canada and the original label was on it, stating a declared value of $100. Ironically the amplifier had been sent from just down the road in Coquitlam in the first place, much closer to me than even Point Roberts. However if I had tried to buy it here at home I would have paid roughly 10 tens as much as the vendor lists it at $335!
http://www.vkmusic.ca/TU-870R.htm
The kit is an Elekit from Japan, model TU-870R. It came with 2 6BM8 tubes and a Hammond style black hammertone case. The entire kit was well packaged and parts packed in numerous small bags and other wrapping, and included step by step instructions in English and Japanese. Fortunately the instructions were also well translated with only a few small typos and fractured phrasing.

It's been a LONG time since I built a kit or any electronics from scratch. But late yesterday afternoon I dug in.
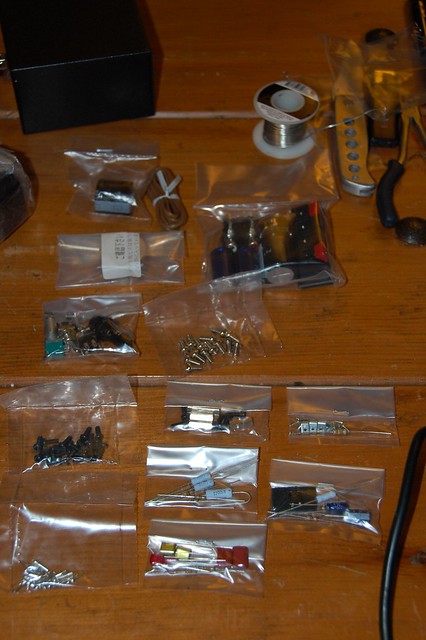
I laid out all the parts and went through a checklist to see if it was all there, and thankfully it was complete with perhaps a couple of extra screws and soldering pins. I didn't check the value of the different resistors and capacitors at this point but did do a count of each type. An optional capacitor was included in the kit designed to help the Signal to Noise ratio.
Wile the soldering station was getting hot, I moved to some other prep work. The printed circuit board was in one piece but had to be scored and broken into the main component board and the input connector board. I sanded the burrs from the scored edge just for tidiness.
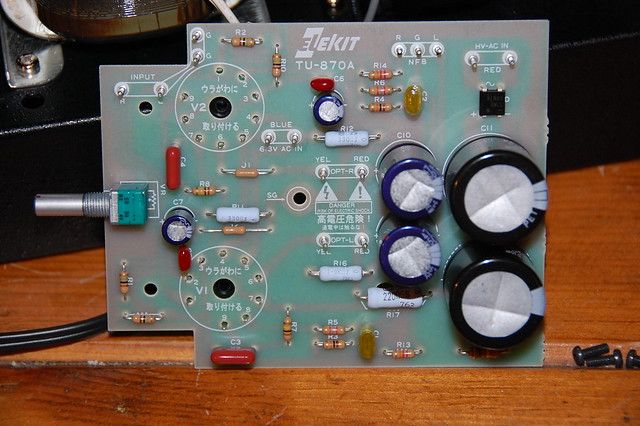
My soldering technique may be a bit rusty at times, but I pretty soon got it done. Reading some of the resistor values was probably the hardest part as these were tiny 1/4 watt types mostly (and my eyes are also a bit rusty!) and the colour bands were a bit hard to make out. I got out my meter to check some of them to be sure. As I went along I also was checking off each of the steps I performed as the kit manual suggested.
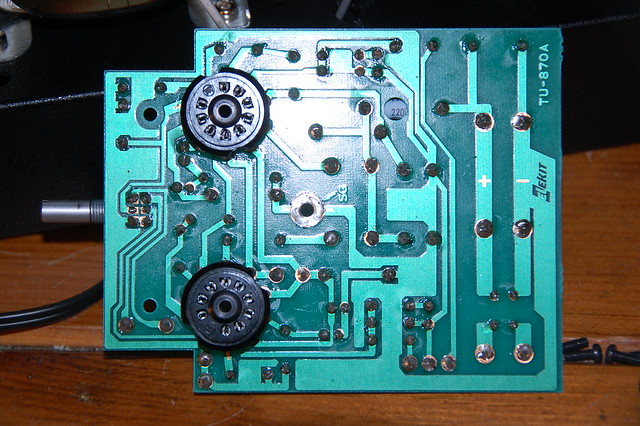
The tube sockets are installed on the face or foil side of the board and the rest of the doodads from the other side. The non-foil side had pretty clear markings for the placement of the different components and pins.
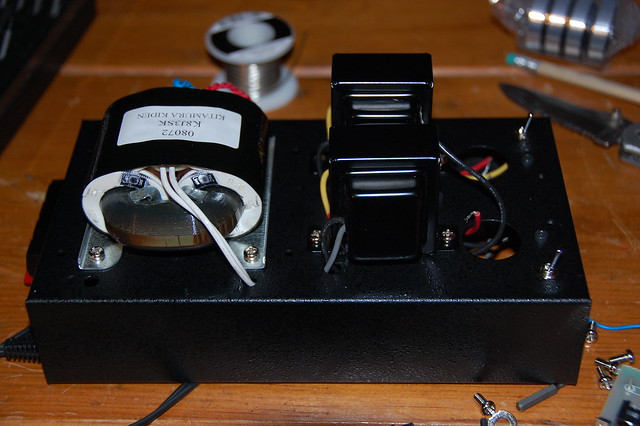
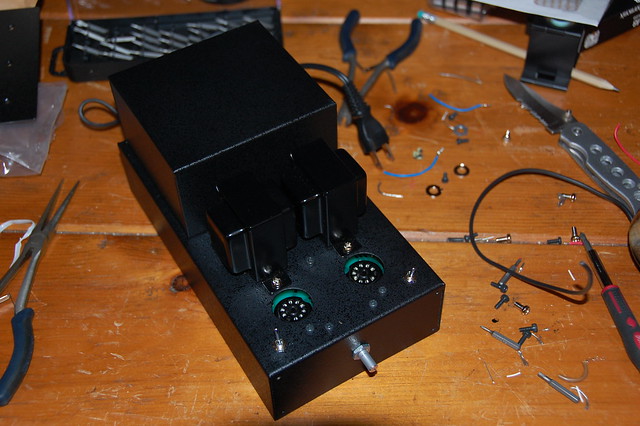
The outside of the case soon had the power transformer and output transformers installed with the supplied hardware. The main case has been pre-drilled and tapped by the manufacturer. There are 2 switches, one for power and the other to select the source as there are 2 sets of RCA connectors for line level inputs (like CD or MP3 player).
The 2 PCBs are mounted with stand-off posts and with the volume control nut for the main board and some small screws for the speaker and RCA terminals. I realized after I had soldered the connecting pins to the input board that I had done them from the wrong side of the board so I had to unsolder them and do it again. This board goes in foil side exposed so they are supposed to be the opposite of the main board but I initially missed that in the instructions.
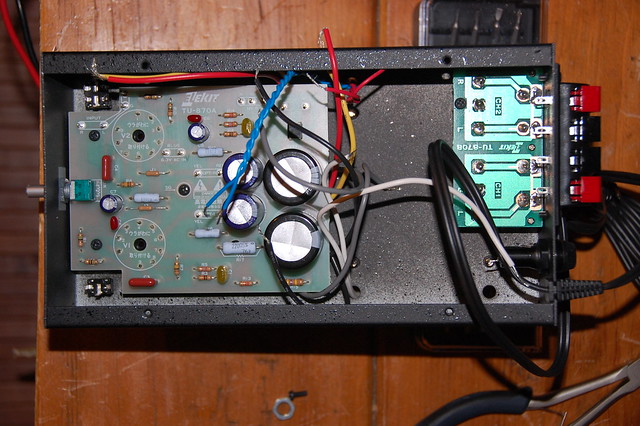
Above is before the internal wiring is complete and below is after. I discovered at this point I had made one other slight boo-boo here in that I had not yet installed the cover over the power transformer. I had to unscrew the PCBs to get at the mounting holes under them. It was getting late by now...
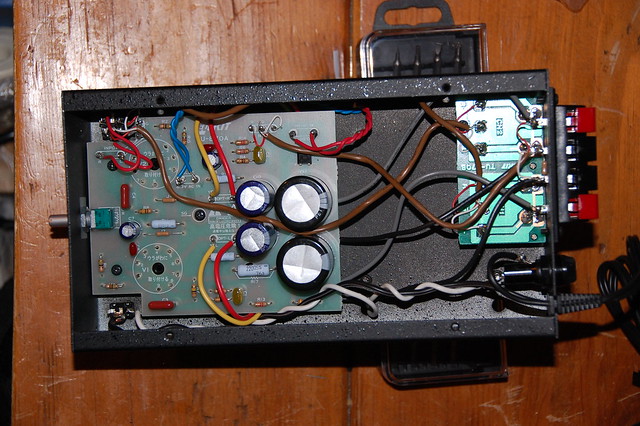
The brown wires were also a bit tricky. They are 2 conductor shielded cable and had to be cut to specific lengths and carefully stripped and twisted, and they are very fine gauge. The black and white wires are the AC power and are twisted together to help prevent hum. The same goes for the 2 blue and red wires from the power transformer.
It's getting close now and I am about to close it all up and install the extra cabinet bits.
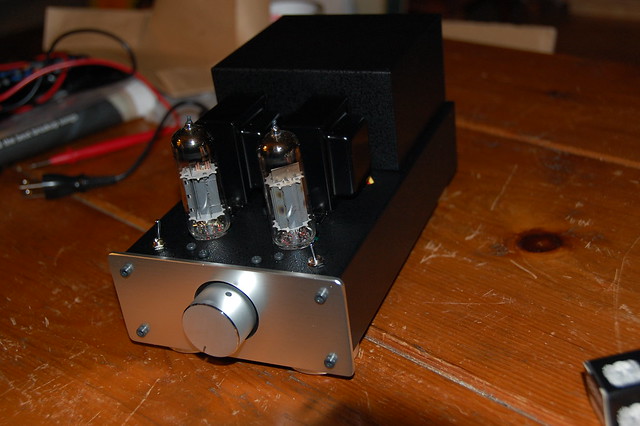
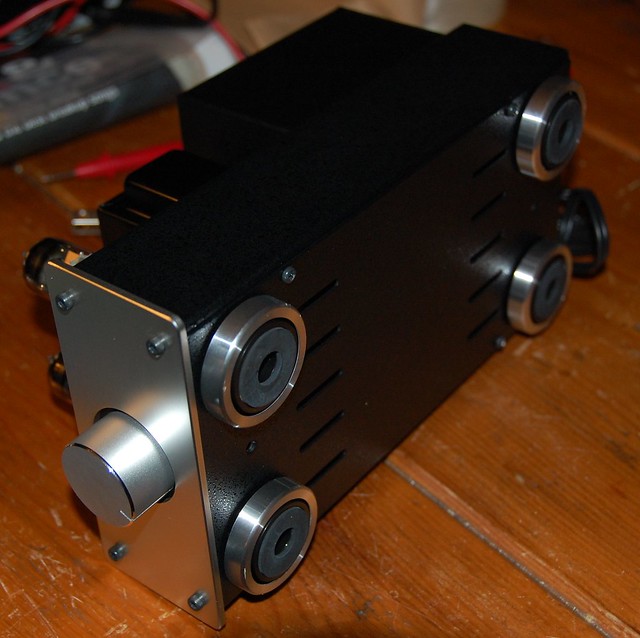
The face plate is brushed aluminum and has some nice looking allen head screws for attaching it. The volume knob is also alumium and is held on with an allen head set screw and sits recessed into the silver face. The pins on the tubes were all straight and installed nice and firmly.
The feet and bottom are on and look good. The bottom panel is drilled so that you can install 3 feet or four and since I have a nice level surface and don't believe there is any reason not to, I use all 4.
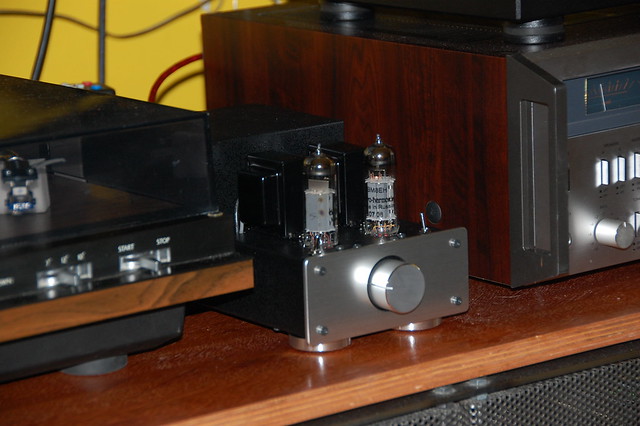
And here is what it looks like, sandwiched in between my turntable and receiver. At this point I have it plugged in the back of the receiver's switched AC jack so the Mitsubishi has to be turned on. I'll rearrange that later, but at 2pm it was bed time!
Build time was probably about 6 hours. I had to stop to make and eat supper (deepfried kalamari with greek salad, homous and pita...yummy!). I probably could have been a bit quicker but I was quite methodical and as mentioned, a bit out of practice.

I hooked it up to my BIC Castle Clyde speakers and had a brief listen last night while I cleaned things up a bit. It sounds great and drives those speakers adequately, but I do have a problem. The left channel is quite a bit louder than the right. It is not a problem with the tubes, cables or the input as I switched everything around and even the speakers. I'll have to break it open again to check and the manual does give me a starting point suggestion in the troubleshooting area. There is a "resistance jumper" at the output terminals which I will check first. I hope it is that simple!
The source is my Rega Planet CD player. In order to attach the turntable I will need a phono preamp which I don't have as a separate unit but I might have to get one.
http://www.vkmusic.ca/TU-870R.htm
The kit is an Elekit from Japan, model TU-870R. It came with 2 6BM8 tubes and a Hammond style black hammertone case. The entire kit was well packaged and parts packed in numerous small bags and other wrapping, and included step by step instructions in English and Japanese. Fortunately the instructions were also well translated with only a few small typos and fractured phrasing.
It's been a LONG time since I built a kit or any electronics from scratch. But late yesterday afternoon I dug in.
I laid out all the parts and went through a checklist to see if it was all there, and thankfully it was complete with perhaps a couple of extra screws and soldering pins. I didn't check the value of the different resistors and capacitors at this point but did do a count of each type. An optional capacitor was included in the kit designed to help the Signal to Noise ratio.
Wile the soldering station was getting hot, I moved to some other prep work. The printed circuit board was in one piece but had to be scored and broken into the main component board and the input connector board. I sanded the burrs from the scored edge just for tidiness.
My soldering technique may be a bit rusty at times, but I pretty soon got it done. Reading some of the resistor values was probably the hardest part as these were tiny 1/4 watt types mostly (and my eyes are also a bit rusty!) and the colour bands were a bit hard to make out. I got out my meter to check some of them to be sure. As I went along I also was checking off each of the steps I performed as the kit manual suggested.
The tube sockets are installed on the face or foil side of the board and the rest of the doodads from the other side. The non-foil side had pretty clear markings for the placement of the different components and pins.
The outside of the case soon had the power transformer and output transformers installed with the supplied hardware. The main case has been pre-drilled and tapped by the manufacturer. There are 2 switches, one for power and the other to select the source as there are 2 sets of RCA connectors for line level inputs (like CD or MP3 player).
The 2 PCBs are mounted with stand-off posts and with the volume control nut for the main board and some small screws for the speaker and RCA terminals. I realized after I had soldered the connecting pins to the input board that I had done them from the wrong side of the board so I had to unsolder them and do it again. This board goes in foil side exposed so they are supposed to be the opposite of the main board but I initially missed that in the instructions.
Above is before the internal wiring is complete and below is after. I discovered at this point I had made one other slight boo-boo here in that I had not yet installed the cover over the power transformer. I had to unscrew the PCBs to get at the mounting holes under them. It was getting late by now...
The brown wires were also a bit tricky. They are 2 conductor shielded cable and had to be cut to specific lengths and carefully stripped and twisted, and they are very fine gauge. The black and white wires are the AC power and are twisted together to help prevent hum. The same goes for the 2 blue and red wires from the power transformer.
It's getting close now and I am about to close it all up and install the extra cabinet bits.
The face plate is brushed aluminum and has some nice looking allen head screws for attaching it. The volume knob is also alumium and is held on with an allen head set screw and sits recessed into the silver face. The pins on the tubes were all straight and installed nice and firmly.
The feet and bottom are on and look good. The bottom panel is drilled so that you can install 3 feet or four and since I have a nice level surface and don't believe there is any reason not to, I use all 4.
And here is what it looks like, sandwiched in between my turntable and receiver. At this point I have it plugged in the back of the receiver's switched AC jack so the Mitsubishi has to be turned on. I'll rearrange that later, but at 2pm it was bed time!
Build time was probably about 6 hours. I had to stop to make and eat supper (deepfried kalamari with greek salad, homous and pita...yummy!). I probably could have been a bit quicker but I was quite methodical and as mentioned, a bit out of practice.
I hooked it up to my BIC Castle Clyde speakers and had a brief listen last night while I cleaned things up a bit. It sounds great and drives those speakers adequately, but I do have a problem. The left channel is quite a bit louder than the right. It is not a problem with the tubes, cables or the input as I switched everything around and even the speakers. I'll have to break it open again to check and the manual does give me a starting point suggestion in the troubleshooting area. There is a "resistance jumper" at the output terminals which I will check first. I hope it is that simple!
The source is my Rega Planet CD player. In order to attach the turntable I will need a phono preamp which I don't have as a separate unit but I might have to get one.
No comments:
Post a Comment