Wednesday, 8 November 2023

Cleaning Turntable Speed Controls

Many turntables and other stereo equipment have variable resistors (often called pots, short for potentiometers, or variable resistors). In the case of turntables they are there to adjust speed. Turntables with this sort of adjustment usually have a strobe light and indicators on the platter to help confirm that you are rotating at the correct 33 or 45 (or 78) RPM. If the platter does not have the markings you use a strobe disc but more on this later. 

For the purposes of this post I am using a basic Sanyo TP-1010 belt drive turntable. It's a belt drive semi automatic model with pitch controls for both speeds. It has fine tuning controls visible externally and other controls inside. It's pretty typical or similar to many models from numerous brands. 

The external fine controls are adjusted by thumbwheels to the right. The internal or gross controls can also be accessed externally but they are under the platter and not visible until you remove the mat or platter. 


Anyway, the speed controls will get contaminated with dust or corrosion over the years and this will lead to them not working properly. The result is that the turntable will not run consistently at the correct speed. Cleaning them often solves this.

Typically I use  a product called Electrosolve from MG Chemicals. Others might recommend Deoxit but I find it too expensive and not necessarily any better. 

When using this or similar products you give a brief fraction of a second shot into the control and then turn the knob or wheel through the entire range multiple times, like 20 or 30, to distribute the cleaner and effectively scrub the path of the variable resistor. 

Sometimes it's easy to see where to spray the cleaner and in this case it's pretty obvious. Other times, and especially on more modern equipment, it's less clear as the parts are better sealed. Essentially you need to look for openings or gaps in the housing of the variable resistors. Look at where the red tube is directed. 

The devices shown above are the fine tuning ones. The gross controls are on a different printed circuit board. They don't need cleaning as often as the others but sometimes they need it too. They must be adjusted with a small screwdriver 🪛 and it's best to take note of where they are pointed and return them to the same spot or as close as possible. Take a picture to help with this. 


The gross adjusters are helpful if you can't get the fine variable resistors to stabilize the speed at or very close to the center of their range. Having them accessible from the top is really handy for this. Otherwise you often have to get creative with some way to support the turntable high enough to get the screwdriver underneath. Blocks of wood, bricks or large soup cans are things I see people using. I found an old magazine rack that works well for this. I don't need it for this job but I will try to get a picture of it later to add to this to give you ideas. 

If you find that you can't get the top mounted fine adjustment VRs (variable resistors) to bring the strobe dots to a stop at the center of their range, try the gross ones. It might only take a tiny nudge with the screwdriver to bring the strobe to a stop but first move the fine adjustment to the middle of its range.

In this turntable there are 4 VRs, but some only have a single fine VR and 2 gross ones. In some there might be no external control at all. And then of course there are turntables that have none. Speed adjustments on those might still be possible but that's another topic. 

Edit: it's been brought to my attention that I should mention cleaning the switch(es). So here we go. 

There are 2 switches in this one. One stops or starts the motor and the other handles the 33 to 45 speed change. In many belt drives the speed change is purely mechanical, as in a lever of sorts moves the belt from one part of the motor pulley to another of different diameter. Not the case here. 

The speed switch is in the lower left and the motor switch is the red and black thing further up the picture. 

Aim your spray as shown and again manipulate the switch a couple of dozen times. 

While you at it, it's a good time to get some oil into the motor and the spindle. In this case I'm using Triflow. There are other choices but lighter is better than thick stuff in my opinion. 

Don't get oil on the pulley itself or at least clean it afterwards. 

I also mentioned that stand that I sometimes use, though in this case it wasn't needed. It's actually a wooden magazine rack I found that had a canvas sling. Without the cloth in the way it's very handy for holding the turntable up high enough to get easy access. A mirror underneath can help too. Look around and you might find other ideas. 


Sunday, 12 July 2015

Dual 1229Q rewire and overhaul

I was contacted about a month by a guy who was referred to me through someone he met associated with a local award-winning craft brewery. Apparently I worked on a turntable now in the possession of brewery guy and he was happy with the work. I'm curious as to who that was. Beer connections are always good.

Anyway, we agreed that I would work on his Dual 1229Q. I've worked on a few before but they were simple jobs and this new guy wanted to really treat it right and was not afraid to spend some money to do so. The 1229Q is worth the effort as well as it is arguably one of their best idler drive tables. It shares top billing with the 1219, 1229 and 1019 (my personal favourite).

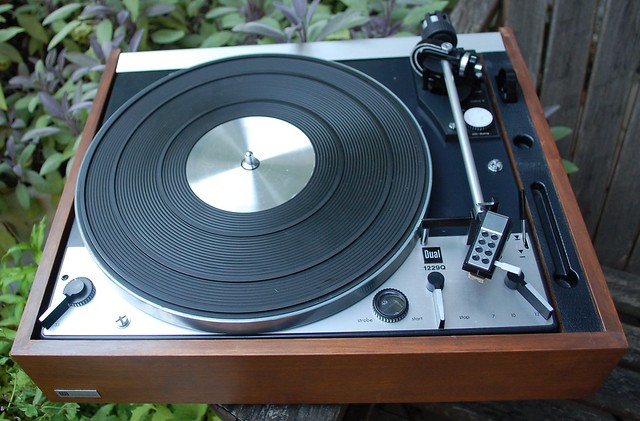
Dual 1229Q 4

The issues were the usual stiff mechanism, erratic tonearm movement, signal loss and so on. The owner brought it over after ordering a few things from an eBay vendor. Those items were a pair of aftermarket steuerpimpels (one for me), the Alvania grease that Dual asks for in the service manual, and the lifter ring for the single/multi play lever. He also received a 62 page pdf file of a custom service document.

The steuerpimpels are nicely made. Probably better than the ones I make from insulation but mine seem to work well too. I actually just acquired some silicon tubing that I am going to test in that application too. The lifter ring looks good, and the grease might be better than what I have used though I can't be sure. He wanted to be as original as possible.

Original didn't quite pan out, but more on that later.

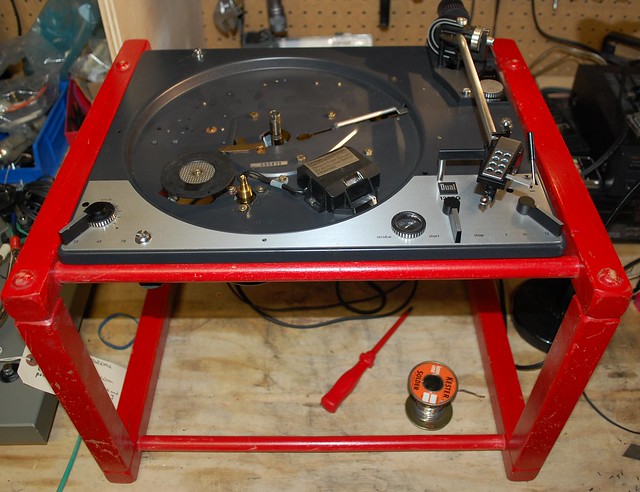
turntable work table


I spent a good amount of time going through the mechanism to remove old grease and re-lube as needed. The speed selector is a common stiff area. The original lifter ring was actually quite soft and supple so I am not sure it needed replacing but I did it anyway.

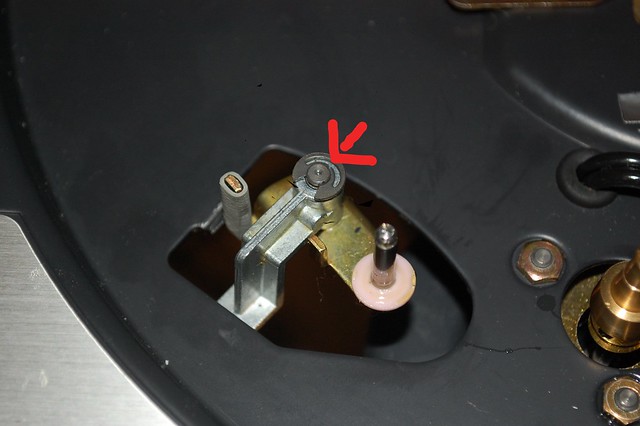
I won't provide pictures and description of all the areas I worked on as they are well documented elsewhere, but I will mention one. Oddly enough, even in the large file I was sent I see nothing about it but I have encountered this on several Dual turntables.

That area is the last pivot point before the idler wheel. It normally is out of sight under the rubber idler which slides onto the shaft to the lower right of the arrow. With the idler removed (easy to do but don't lose the plastic retaining washer) you can see the problem area at the head of the red arrow. That is a metal on metal pivot point and it frequently is very stiff or even immovable due to dried up lubricant. If it doesn't move freely the idler will not make good contact with the motor capstan and/or platter. Result? Slow or no platter movement.

The solution is to remove the e-clip and force the arm out from the bottom, clean thoroughly, lube and reassemble. I have found some so stiff that they were very hard to get off. Applying heat helps, such as a heat gun or even a hair dryer on high, as this will soften the old grease.
  

Dual 1229Q idler arm


After working out most mechanical bugs relatively easily and predictably, but also spending hours on trying to get a consistent signal, I had to make a phone call to the owner.

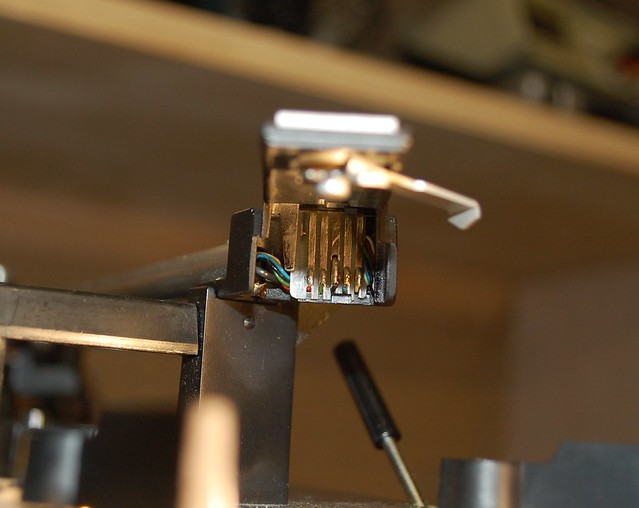
The Dual cartridge holder is a great thing in some ways as it allows for easy cartridge changes. However it is prone to corrosion and other issues that impede the signal path. I cleaned extensively used my meter a lot, removed and reinstalled, tried different cartridges, touched up solder joints and on and on, but I still I could not get a consistent signal on one channel. When I did get one it would usually go away after the needle was on the record for a minute or 2.

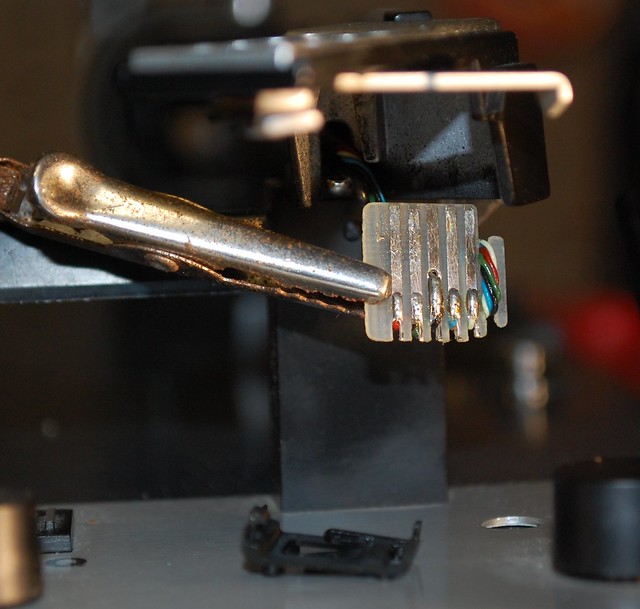
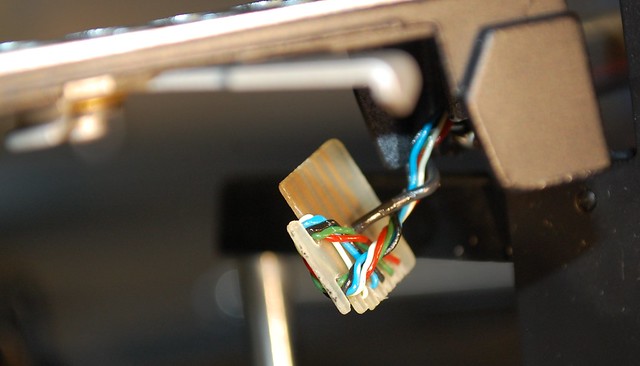
This lead me to the conclusion that a wire was broken somewhere in the tonearm. I reflowed solder joints at the little printed circuit board in the end of the arm and that did not help either. We agreed that  re-wiring the arm was probably best. The pics below show the PCB in the arm which was soon to be no more.

Dual pcb

Dual pcb 2

Dual PCB back

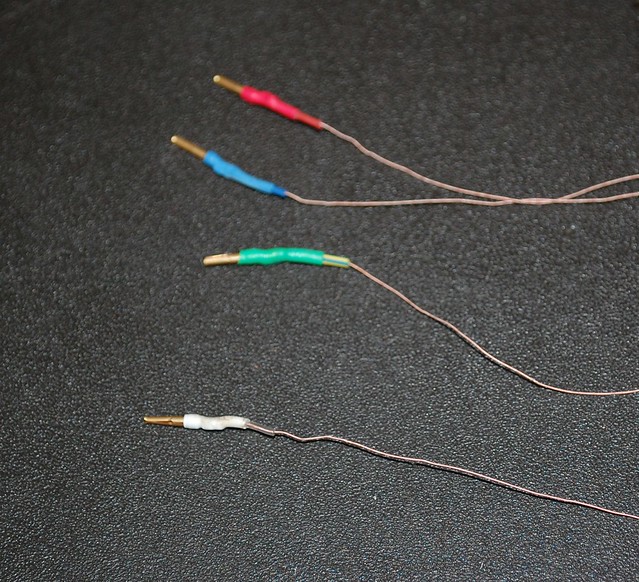
This part of the job was an outright pain in the ass. I have rewired tonearms before but it's never really much fun. The wires I had already on hand, Litz wire from ISOkinetik.

I won't describe the process completely but I threaded the new wires through after soldering them in a bunch to one of the old wires and pulled them through that way. Getting them to go through the various bends was a bit tricky but eventually it worked out.

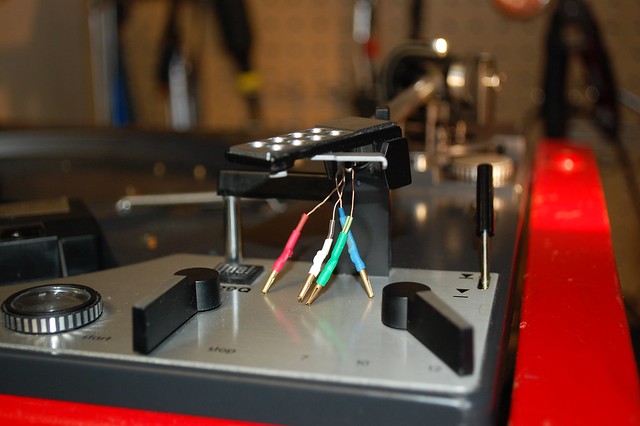
The end result was a complete bypass of the contacts in the Dual sled. The tonearm wires now push directly onto the cartridge pins and travel uninterrupted to the circuit board at the muting switch under the turntable. I removed the pins and leads in the sled and the PCB in the arm. It's not as convenient to change a cartridge now, but it works...and works well!

Litz wires


Dual 1229Q rewired


Dual new wiring

Dual 1229Q litz wiring 2


I wasn't done yet. After dealing with all of this, I told the owner that he could pick up his machine. However I was test driving the table for a few hours (I almost always do this before returning a repair to a client) and was starting to hear annoying chirping sounds. I realized this was coming from the motor, so decided to throw in a motor overhaul.

I've done a full disassembly and relube of some Dual motors in the past but not of this series, so I told the owner this would be "on the house" as I would put it down to practice. After all I have a 1219 of my own to do soon...

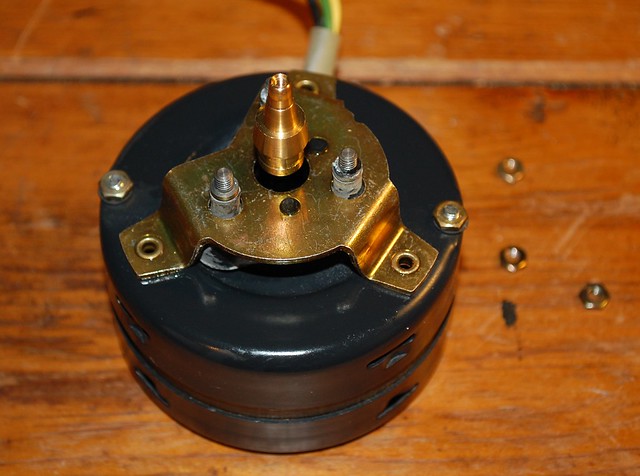
It is actually pretty easy and again well documented elsewhere, so I won't shows all the details here. Here's the motor removed from the chassis.

Dual 1229 motor


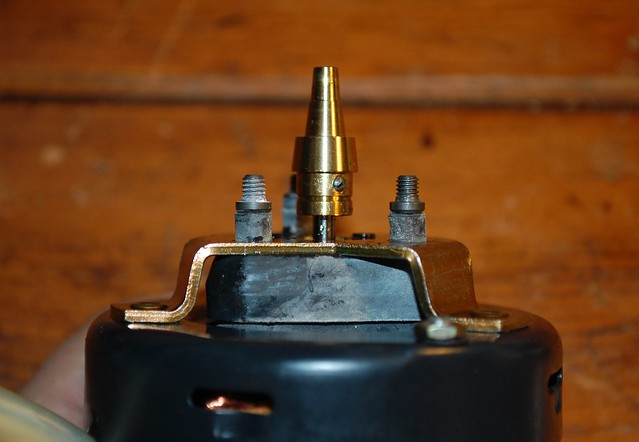
I took the next picture to help me get the capstan at about the right height when I put it back together. I still had to move it a couple of times to get it right.

Dual 1229 motor capstan

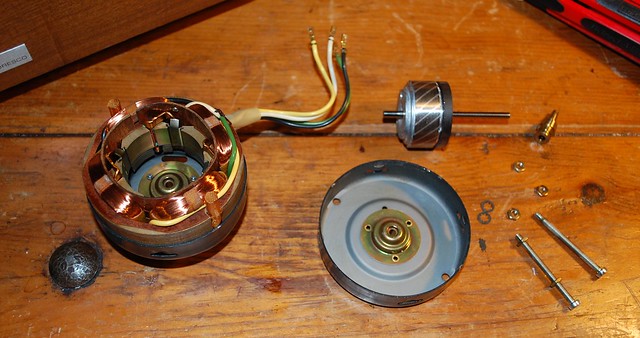
The motor in pieces. The hardest part was prying the 2 halves of the clamshell housing apart. It will be easier next time as I have a tool in mind.

The areas that needs oil at this point are the center brassy coloured bushings in the 2 halves of the housing. I used several drops of 10W40 non synthetic oil from the auto supply store 2 blocks away. I'll keep a small bottle and put the rest in my car.


Dual 1229 motor disassembled

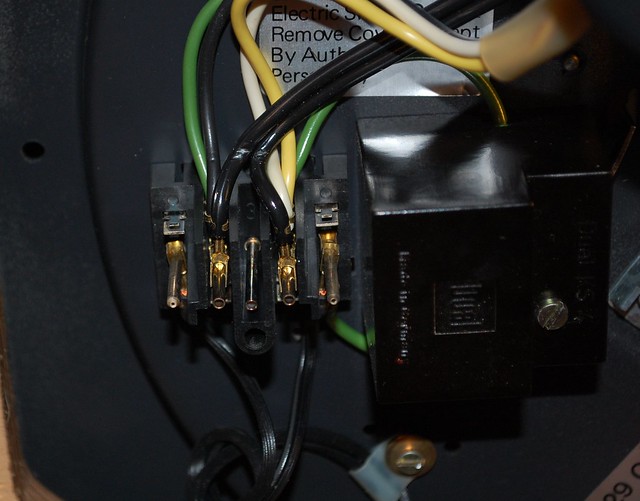
Here's the inside of the box that contains the wiring harness. It's always a good idea to take pictures of these places to help putting them back together properly later.

Dual 1229 wiring harness


I didn't take a picture of the insides of the box beside it. That contains the spark suppressing capacitor. As it tuned out, after doing everything else, there was a 'pop' still as the turntable motor started and stopped. I did not remove the existing capacitor but bridged it with a new one similar value, a .10mfd at 630 volts (the original is 700 volts) and the noise went away.

Phew! I think I am done...

And the owner has his turntable back. My hourly rate on this one was terrible, especially after considering parts and trips to the electronics store but it was another learning experience. If I have to do one like this again, it will go more smoothly I hope!

Tuesday, 14 April 2015

More turntables than I can shake a stick at

Along with the Space Lab stuff, where I might fix several turntables or other pieces of gear in one day, I've had a few around the home front too.

This Pioneer PL-A35 for example, went from this:


to this.


It will soon be on the market.

I also tuned up a Pioneer PL-4 and it works great now.


And I also have the Sansui 2050C ready for market. I love the power light and the lid prop stick thing on this. Very 1960s or something.


This Sony PS-X40 is no slouch. It's got a great arm and nice features with automatic functions and servo controlled direct drive. Too bad about the Handsworth School name etched into the plinth. Just maybe I will modify that silverware cabinet to take this as the controls are all on top and the etching on the front will be invisible inside the cabinet.


I've worked on others but they are kind of ho-hum compared to the next one, which is currently the one I am using at home. Here's a beautiful Denon DP-3000 with an AudioCraft AC-300 tonearm. In the first pic you see it with the headshell and Grado cartridge I go it with but I am now using my Denon DL-103R moving coil on it in a Jeweltone headshell. It's a nice match.


Good grief!

So, I was given a bit of grief today (nicely) by a co-worker who has followed my blog a bit. "When are you going to post something new?" Yes I've been bad...

I have been busy though. I've actually not worked on as many projects for myself as I have for Space Lab. I have a shop space there and work on vintage gear for the store and some of my own stuff too. One day I will show some pictures of the workshop, but probably not until we get it cleaned up a bit as we have had some "issues", like a flood from a damaged sprinkler for example.

Right now I'll give a small taste of some of the things I've done in the last several months and some of the projects ahead. Here's one, a silverware chest turned into a stereo stand. It's still somewhat unfinished but fully functional as is.

The "before" pic.


The "after" pics


And the "in between" pics.


I had to modify the drawer so the wiring could drop behind it through the slot I cut in the new plywood bottom. The B&O turntable works nicely because it is such a low profile but I might lower the shelf so I can use something deeper, though will require another re-work to the drawer. I'm also thinking I could add a holder to the lid for the "now playing" selection, and a bit of trim and finishing work.

I think it looks pretty cool. But we don't have anyplace for the fancy silverware now!

Tuesday, 13 January 2015

Yes, I'm still here.

I've been remiss in posting my successes (and failures) on this blog, so I'll try to rectify that soon. I've actually had lots of projects. In fact there have been so many that I have not found the time to talk about them. That's my excuse at least.

For the time being, I'll just mention that I have added a new link to the right for the Voice Of Music site. I use a few different sources for parts and advice and Gary at VOM is one of the nicer ones. His specialties tend toward idler drive turntables and changers but he can be a handy source for belts and needles and other parts for vintage gear and at affordable rates.

So, there's my plug for today. I'll be back with more soon. 

Tuesday, 1 April 2014

Advent 300 Refurbish Part Deux

Continued from...

So I have been away from this a while but the Advent moved into another phase and is now working better and looking way better.


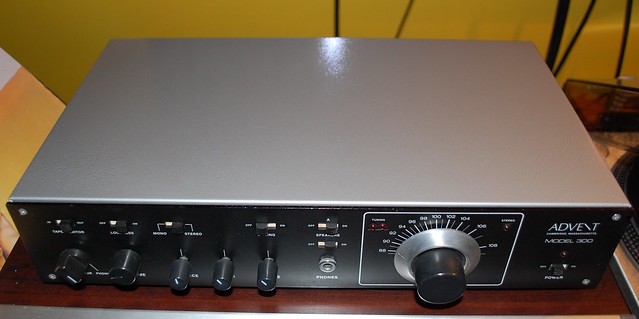
Advent 300 Hammertone


Internally I have replaced most of the electrolytic capacitors though I still have a few to get to. The large power supply ones were the first and as the leads on them were radial (short and on one end) rather than axial (one long one out each end) I had to get a bit creative for mounting. I'll get a pic of that later.

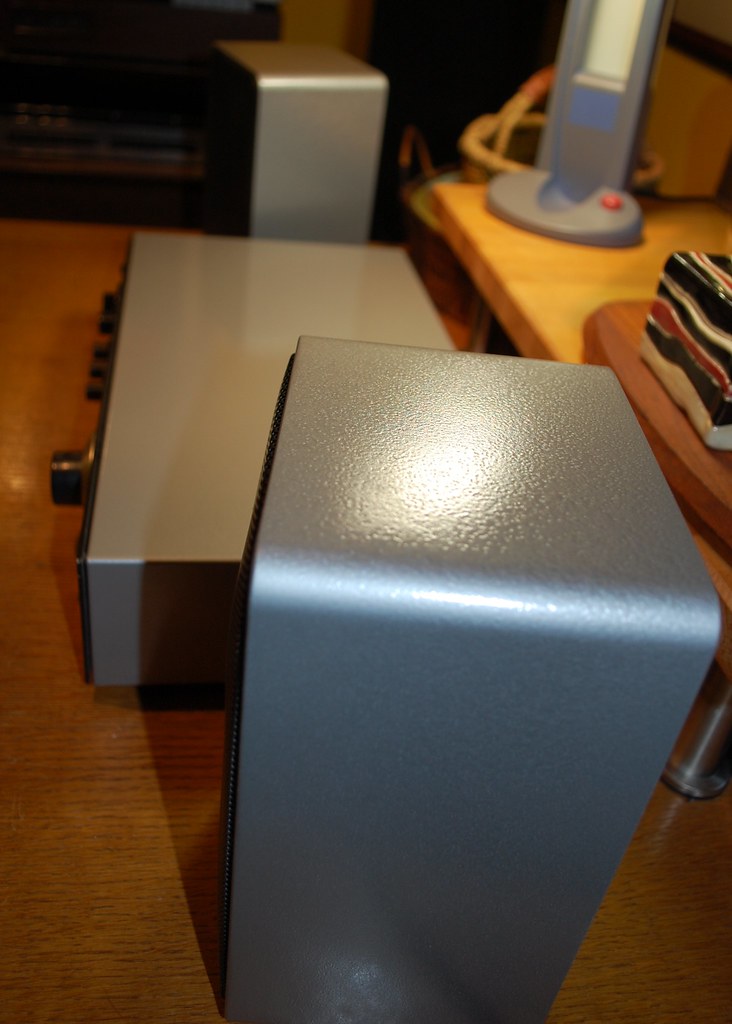
The paint job is the obvious difference. These Advents look very industrial or utilitarian, almost military. The cabinets remind me of the Hammond project boxes my dad used to use on his home made stuff. This needed a repaint so why go with black? The face plate was generally pretty good and with all the text on it I am really glad it was as that would be hard to redo.

I used a grey hammertone paint which gives that industrial slightly pebbled or textured finish. It also is good at hiding minor imperfections, and since I am an impatient painter it works well for me. I stripped the black off mostly with paint stripper, sanded and primed before 2 coats of paint.

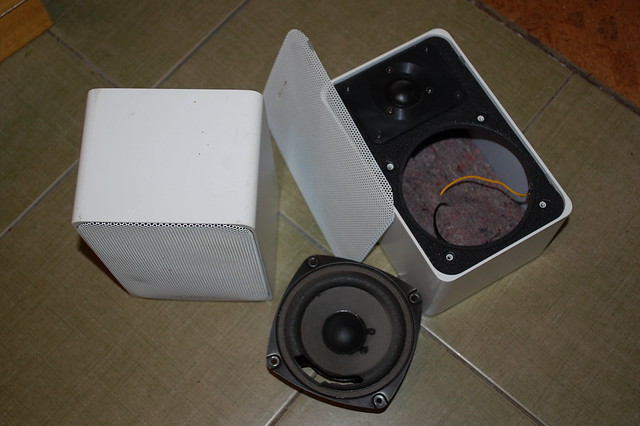
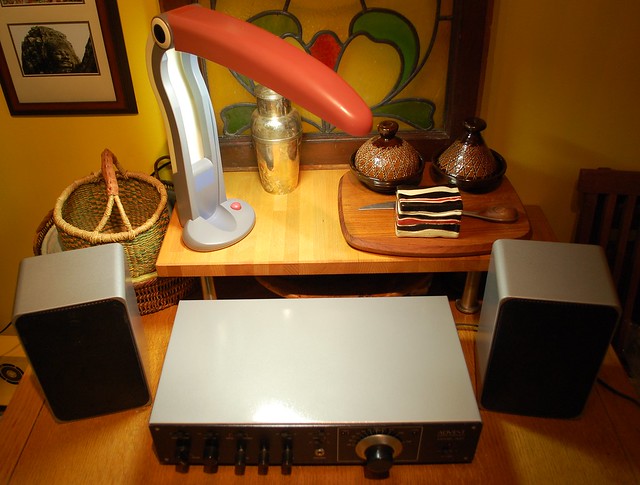
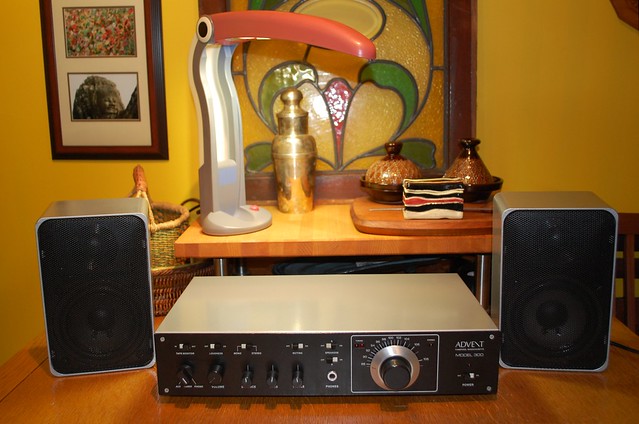
Recently I picked up a set of Realistic Minimus 77 speakers in white. These have aluminum cases and are bigger cousins of the Minimus 7 of which I have a few sets. They also needed new woofer foams which I have since done.

Minimus 77

Here's how things turned out.

Minimus 77 finish

Minimus 77 & Advent 300


Advent Minimus & Toucan

Thursday, 30 January 2014

ADVENT 300 Receiver Rebuild - Part 1

I've had this ADVENT 300 receiver hanging around for quite awhile and it's time to get busy on this project. It's not hard to tell it needs a little work.


 Advent 300 receiver

I plan to improve on the cosmetic issues as you can imagine, but also plan to replace other parts to update this classic receiver that came out the year I graduated from high school. Back then I had a tube receiver that I scavenged from a Viking stereo console that an elderly neighbour was tossing out. She had had a tube TV catch fire and didn't trust them (tubes) any more so was going all solid state. She was still sticking with Viking, the Eatons house brand name though. Little did she know that almost 40 years later people still want those tube gadgets. But I digress...

The Advent 300 is still considered to be a great performer and even with its low power of 15 watts per side and kind of chintzy build quality it can rival much nicer newer amps. It's an FM tuner only (even back then AM sucked), and pre and power amp in one case, with jumpers between the pre and power sections so you can use it with other components or add an equalizer if you like.

This one has some stickers and scratches that have taken off the paint, rust damage, and just old parts. The voltage regulator has already been replaced but as far as I know it has had little servicing since new.

Advent 300 case 2

Advent 300 case

The old electrolytic capacitors are all going to be replaced in this project. I will also be trying to clean up or replace some of the fittings, for example the grounding screw and AC jack on the back are respectively rusted and cracked.

I'm going to clean extensively and might "reflow" solder joints. Essentially that means melting the existing solder to ensure that the contact is good. I will replace some of the jumper wires I think too, and clean up the routing in the process. Maybe I will anyway; I will certainly have a look at them and replace if questionable.


Advent 300 inside top


Advent 300 PCB

In the pic above and the one below you can see some of the rust on the case near the power supply and on the RCA connectors. I've actually removed a lot of the corrosion on the RCAs to the left already with a 3M pad and sand paper. The ones to the right are essentially untouched.


Advent 300 RCA jacks


Here you can see the power supply. My first actual real "upgrade" is to replace the 2 large capacitors you see to the left. The stock components are 3000uf at 30volts but I will be using 4700uf at 50volts which is totally acceptable as a component value change for this area.

Advent 300 power supply

In addition to other resources, I am using the excellent website by David Eaton devoted to the Advent 300 as a reference. Thanks David!

http://www.davidreaton.com/Model_300_receiver_main_page.htm

I'll be back soon with Part II...


Wednesday, 15 January 2014

Ol' Shakey on the Swirly Table

Neil Young by Buhduh
Neil Young, a photo by Buhduh on Flickr.
I treated myself to one of my current favourite records on my current favourite turntable.

Neil Young, live at Massey Hall 1971 is an amazing record in my opinion. A man with a guitar, and sometimes a piano, in a hall with great acoustics and a reel to reel tape deck propped up on an office chair...what could be cooler than that?

Apparently this recording was "lost in the vaults" for 30 or more years before Neil decided to listen to it and eventually release it in 2007. Neil is a stickler for, and proponent of, high quality recordings including digital media formats. He didn't give this recording much thought but when he listened to it after many years he realized it was good and deserved releasing.

Deserved indeed. It's really good. Really really good. And I only discovered it a couple of months ago myself. Go buy it. If you can't get the vinyl, buy the CD or the DVD. Or get them all.

It sounds great on my newest turntable project and is a good showcase for any system. This "swirly table" as I have been calling it is a Technics Sl-1200 MKII that was in usable but battle scarred condition when I got it, but not anymore.

Technics 1200 MK2 3

I can't stand the mess that DJ tables become. It's not just DJ tables but a lot of other too that people abuse. So I fix them up.

This one had already had the RCA cables replaced and obviously whoever did that had some idea what they were doing so I saw no reason to mess with that. I dealt with the cosmetic and other issues.

I took it apart and went to my friends shop with it with the intent of bead-blasting all the paint off but it turned out that the blaster was not working well. I got some paint off with it, but now I was kind of stuck, so I grabbed the angle grinder and a sanding disc and took the rest of the paint off. When I got it home a did a bit more controlled work with my Dremel and a sanding disc. I like the random swirly effect of this. I then gave it a few coats of a satin finish clear coat spray paint.

Technics SL-1200 Raw

Technics Sl-1200 raw 2

A few parts also needed replacing so I ordered them and I put it aside. It took a few months before I decided to get back at it and just the other day I put it back together. I had to get a trim piece for the pop-up target light, a new slider trim plate and ordered a lid and hinges. I also decided to order an LED kit but decided to just replace the pop-up light which was burnt out anyway and the pitch LED. The stock one is green but the new one is white. It's a bit too bright IMO so I will try to do something about that.

Anyway, here's the mostly finished product.

swirly Technics 1200

And the darn near completely finished item. It has the new parts mentioned above, a couple of new feet, and the heaviest thickest Technics mat. I even took an aluminum 45 RPM adaptor and "swirled" it with my Dremel. I still am going to tweak a few things but I really like how it has turned out.

swirly Technics 1200 4


Saturday, 9 November 2013

From 66 & 2/3 to 33 & 1/3

I have not posted in awhile but thought I should start it up again. This one is about another Dual turntable problem and a solution for it. Hmm, that kind of makes it sound like Dual turntables have a lot of problems. That's sort of true, but they had a lot more turntables than most. More models and more in quantity sold too. Have a look at this page if you don't believe me:

http://www.dual-reference.com/tableinx.htm

So, the problem fix for the evening involved a Dual 510. The motor on the original version of the 510, and a few other models as well such as the 601 and 1249, had a tendency to run at twice the standard speed occasionally. This apparently did not happen on the Duals at home in Germany where the electricity from the wall is 240 volts at 50 HZ, but here in North America at 120 volts & 60 HZ it sometimes occurred. The motor in question was the SM-840. Later versions included the SM-840-2 and -4 and they had found a fix by then.

The motor runs at the right speed about 80% of the time and simply turning it off and back on usually makes it run at the correct speed. This is the second of these turntables I have had this issue with, and while you could live with it, I would rather make it go away.

Dual 510


The later motor model SM-860 also fixed the problem, and a kind person on Audio Karma sent me one very inexpensively.


Dual SM-860

With the turntable flipped over (yeah I know, the picture could be flipped too) here is the original motor. I took out the 2 large screws and 1 small one on the motor, and removed the cover for the electrical connections.

Dual SM-840

Swapping the entire motor is not required. You really only need to change the motor winding part which is off to the right in this pic. The entire motor can be taken out but there are several more screws and the pitch control belt to mess with if you do that. This is easier...sort of.

Dual 510 inside

I often take close-ups of the wiring or other important details so I can make sure they go back the same way.

Dual 510 wiring

This is a good time to oil the motor bearings. Note the scarring on the armature. I'm not sure how that came about.

Oiling bearings

Top bearing with some fresh oil.

Top bearing

And going back together.

Putting it together

Fully reassembled, but I still had some fiddling to do. I found that there was a lot of stiffness in the motor and it barely turned under hand pressure and not at all with power applied. I played around with the tightness of the 2 bolts that hold the bearing mount and that did not help right away.


Dual back together

I swapped the armature from the 860 in place of the 840, thinking that maybe the scoring you see was a factor. The brass capstan was not at the same height though and I have trouble with those little screws before so changed it back to the original (on the right). This time when I put it back together it worked smoothly. It could have just been the orientation of the top and bottom bearings which are in kind of ball and socket joints.

Dual armatures

Anyway, it all worked out! I cleaned the entire table up further, oiled the platter well, gave the lid a quick polish and here you go! Starting and stopping a bunch of times and the speed is just as it should be every time.

Dual 510 2

In this pic you can also see the cuing lever I made from a bicycle spoke and spoke nipple. That lever was missing as well and this stuff was handy.

Dual 510 3

It still has a few cosmetic issues but it looks good and works well.

Dual 510 4